






 Multi-Vendor & Complex SaaS Marketplaces
 Modern Headless & Jamstack Web Development
 High-End Corporate & Specialized Business Websites
 Advanced API, Checkout & Database Troubleshooting
Checkout Extensibility Migration: Replace checkout.liquid in Melbourne
Migrate off legacy checkout.liquid to Shopify Checkout Extensibility with clear DIY steps for Carlton 3053 merchants—plus when Fixwebnode should take over.
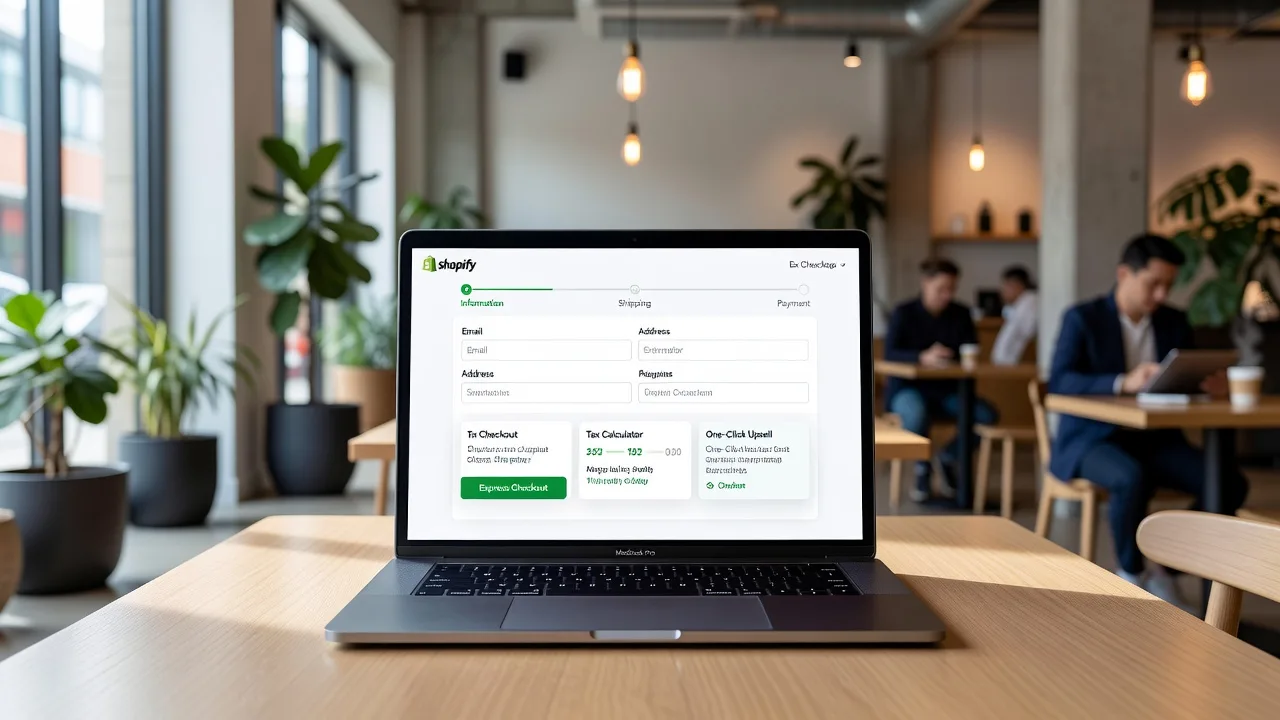
If your Shopify store still depends on checkout.liquid scripts, you are on borrowed time. Shopify has moved Plus and eligible stores to Checkout Extensibility: UI extensions, Shopify Functions, web pixels, and app-based customisations instead of editable checkout Liquid. This guide is for store owners and small businesses in the City of Melbourne, including Carlton 3053, who need a practical path off legacy scripts without breaking conversion.
Below you will find the migration story end to end: why it matters, three distinct failure modes we see on real checkouts, numbered DIY fixes (including Shopify CLI where it helps), and when to book Fixwebnode’s Checkout Extensibility migration specialist rather than risk a live cart outage.
Why checkout.liquid migration matters for Melbourne merchants
Legacy checkout.liquid let developers inject HTML, CSS, and JavaScript directly into checkout. That power also created fragile stores: one theme update, one app conflict, or Shopify’s forced move to the extensible checkout and the script simply never loads. Checkout Extensibility replaces that model with sandboxed UI extensions, Functions for discounts/shipping/payment customisation, and Customer Account / Thank You / Order status extensibility.
For retailers around Carlton and the wider City of Melbourne service area, the business risk is concrete: abandoned carts when custom fields vanish, lost attribution when pixels die, and support tickets when gift-message or B2B PO fields stop validating. Completing migration early keeps you on supported APIs, unlocks Shop Pay and one-page checkout improvements, and stops emergency fire drills when Shopify finally removes remaining liquid escape hatches.
Fixwebnode works as a direct Shopify specialist for this exact migration—not a bidding board. Local context matters for pickup messaging, GST-aware shipping Functions, and AU payment methods, but the technical core is the same: inventory every checkout.liquid behaviour, map it to an official extension surface, test in a development store, then publish.
Common issues when replacing checkout.liquid with Checkout Extensibility
These problems are distinct. Each has a different root cause and a different fix path.
- Issue 1 — Custom buyer fields and line-item properties go missing. Symptoms: gift notes, engraving text, delivery date, or B2B reference fields that used to appear under shipping no longer render; orders arrive without the metafields your warehouse expects; checkout shows a blank block where Liquid used to print inputs.
- Issue 2 — Third-party trust, upsell, or validation scripts silently fail. Symptoms: console errors about blocked scripts; “place order” works but upsell modals never open; address validators or ABN checks that hooked DOM nodes in checkout.liquid do nothing on the extensible checkout.
- Issue 3 — Thank You / Order status customisations and analytics pixels break. Symptoms: post-purchase upsell HTML gone; Google/Meta events fire on storefront but not on purchase; additional scripts that lived in checkout.liquid’s thank-you section never migrate because that surface is now extension- and pixel-based.
How to fix Issue 1: restore custom fields with Checkout UI Extensions
Root cause: free-form Liquid inputs are not supported on the extensible checkout. Buyer-facing fields must be Checkout UI extensions (or supported apps) that write cart attributes, note attributes, or line item properties through the extension APIs.
Step 1 — Inventory every field your old checkout.liquid created.
In admin, open a recent order that still has the custom data. Note attribute names (for example gift_message, delivery_date). In your theme or private app repo, search checkout.liquid (and any checkout assets) for those keys so you know exact property names fulfilment still reads.
Step 2 — Create a development store copy and enable Checkout Extensibility features you need.
Use a Plus development store or a duplicate where you can publish checkout extensions safely. Confirm Online Store → Preferences and checkout settings show extensible checkout (not classic liquid editing).
Step 3 — Scaffold a Checkout UI extension with Shopify CLI.
npm install -g @shopify/cli @shopify/theme
shopify auth login
shopify app init
cd your-app-name
shopify app generate extension
Choose a Checkout UI extension type (for example block on the information or shipping step). Target API version current to your Partner app.
Step 4 — Implement the field and write cart attributes.
In the extension’s React components, use the checkout UI components (TextField, Banner, BlockStack) and the useApplyAttributeChange / line-item property APIs as documented for your API version. Keep attribute keys identical to what warehouse and ERP already expect so you do not retrain staff.
Step 5 — Map validation that used to be inline JavaScript.
Length limits, required gift messages on certain products, or blocked delivery dates should live in the extension UI plus, where rules must be enforced server-side, a Cart or Checkout validation Function. Do not rely on DOM hacks.
shopify app generate extension
# select Function → cart checkout validation (or equivalent current type)
Deploy the Function, then attach it in checkout editor / Functions settings.
Step 6 — Verify on a test checkout.
- Start the app:
shopify app dev - Open the preview checkout link CLI prints.
- Complete a test order with the custom field filled and empty (required case).
- Confirm the order in admin shows the same attribute keys as pre-migration orders.
When to call Fixwebnode: multi-field B2B forms, conditional fields by product tag or customer tag, or ERP metafield contracts you cannot break. Carlton retailers with same-day courier notes often need Functions plus UI work in one release—book a specialist before you publish half-migrated fields.
How to fix Issue 2: replace blocked third-party scripts
Root cause: the extensible checkout does not allow arbitrary script tags from checkout.liquid. Trust badges, shipping estimators, address tools, and upsell widgets must become apps with Checkout UI extensions, or be removed if the vendor has no extensibility support.
Step 1 — List every external script your liquid file loaded.
Export or open the last checkout.liquid revision. Note every script src, inline snippet, and app embed that targeted checkout. Build a spreadsheet: vendor, purpose, still required (yes/no), extensibility-ready app (yes/no/unknown).
Step 2 — Prefer official app replacements over custom forks.
In Shopify admin → Apps, check whether each vendor ships a “Checkout UI” or “Extensibility” version. Install only on the development store first. Duplicate features (three trust-badge apps) should be cut to one to reduce extension surface area and layout shift.
Step 3 — For in-house scripts, rebuild as UI extensions or drop them.
If a local script only injected CSS for a badge row, recreate layout with checkout branding settings and a simple UI extension image block. If it manipulated payment buttons or intercepted submit, stop—those patterns are unsupported and will fail reviews and runtime sandboxing.
shopify app generate extension
# Checkout UI → build the badge / helper block only
shopify app dev
Step 4 — Re-test payment and shipping paths AU merchants actually use.
- Test Shop Pay, PayPal, and your primary card gateway separately.
- Test local pickup vs delivery if both appear for Melbourne metro postcodes.
- Watch the browser console on the extensible checkout; sandbox errors usually name the extension.
- Remove any leftover script references from old theme assets so staff do not re-enable liquid snippets by mistake.
Step 5 — Document apps that cannot migrate.
If a vendor has no path, decide: lose the feature, switch vendors, or fund a custom extension that recreates only the compliant behaviour. Do not attempt to inject remote JS through unsupported surfaces.
When to call Fixwebnode: address validation tied to carrier APIs, custom ABN or wholesale gates, or multiple unpaid apps fighting for the same checkout block. A direct specialist can sequence app installs and custom extensions so Carlton 3053 peak trading is not the first production test.
How to fix Issue 3: Thank You page, Order status, and purchase pixels
Root cause: post-purchase HTML and marketing tags that lived in checkout.liquid do not auto-port. Thank You and Order status use their own extensibility model; analytics should move to web pixels (and/or customer events) instead of raw script tags.
Step 1 — Separate “UI after purchase” from “tracking”.
UI (survey links, support phone, pickup instructions for Carlton storefront pickup) belongs in Thank You / Order status UI extensions or the checkout editor’s app blocks. Tracking (purchase, begin checkout) belongs in web pixels subscribed to standard customer events.
Step 2 — Add or migrate web pixels.
In admin, open Settings → Customer events. Add pixels from your marketing stack if they provide a Shopify web pixel, or create a custom pixel that only uses the sandboxed customer events API—never checkout.liquid leftovers.
# Partner app route for a custom web pixel extension
shopify app generate extension
# choose web pixel extension type when listed
shopify app dev
Subscribe to events such as checkout_completed per current Customer Events docs. Map order total, currency (AUD), and IDs exactly as your ads account expects.
Step 3 — Rebuild Thank You / Order status content.
- Open checkout editor for Thank You and Order status profiles.
- Add official app blocks or your UI extension for post-purchase messaging.
- Move any “next steps” copy that used Liquid conditionals (for example local pickup vs shipping) into extension logic reading order / delivery method.
- Publish to a draft checkout profile first if your shop supports profile testing.
Step 4 — Verification checklist.
- Place a real test order (gateway test mode).
- Confirm Thank You UI shows pickup or delivery copy correctly for a Melbourne metro address.
- In tag assistant / pixel helper / server logs, confirm one purchase event (no duplicates from old liquid + new pixel).
- Disable any obsolete checkout.liquid script includes still referenced in private documentation so future contractors do not reintroduce them.
When to call Fixwebnode: dual tagging nightmares, server-side tracking, or post-purchase upsell flows that must remain revenue-neutral through migration. Attribution loss is expensive; a specialist pass before a campaign launch is cheaper than a month of bad data.
When DIY is enough vs when to book Fixwebnode
DIY is enough when: you have one or two simple cart attributes, your apps already advertise Checkout Extensibility support, you can test on a development store, and nobody on the team needs Functions beyond a basic validation. Follow the numbered steps above, keep attribute keys stable, and publish only after a full test order on every payment method you offer.
Book Fixwebnode when: checkout.liquid contains intertwined JS (fields + payments + pixels), you run Plus Functions for shipping or discounts, wholesale and DTC share one checkout with different rules, or a previous partial migration left half-enabled extensions. Also book help if you are under a hard Shopify deprecation deadline and cannot staff a developer full-time.
Fixwebnode is the direct specialist for this work in Melbourne’s inner north and the broader metro—see the Shopify Website Developer in Carlton 3053 page for the local entry point, and all service areas if your warehouse or second brand sits outside Carlton. Geography is about who can meet you on AU business hours and understand local fulfilment copy—not a marketplace of random bids.
Talk through your checkout.liquid exit plan
Checkout Extensibility migration is not a theme tweak; it is a controlled replacement of every behaviour liquid once hid inside checkout. Inventory fields, kill unsupported scripts, move pixels to customer events, and only then publish. If you want a second pair of eyes on Carlton 3053 or City of Melbourne storefronts before you flip the switch, start a conversation with Fixwebnode via the landing page: Checkout Extensibility Migration for City of Melbourne.
Bring your current checkout.liquid export, a list of must-keep fields, and two recent orders that show the custom data. That package is enough to scope DIY versus a full specialist migration without drama on launch day.