




 Multi-Vendor & Complex SaaS Marketplaces
 Modern Headless & Jamstack Web Development
 High-End Corporate & Specialized Business Websites
 Advanced API, Checkout & Database Troubleshooting
Smart Grow Box Fixes: Water, Light & Climate Control in AU
Stop guessing with herbs and houseplants. Learn the hardware faults that break automated watering, lighting, and climate control—plus DIY checks and when to book Fixwebnode on site in Australia.
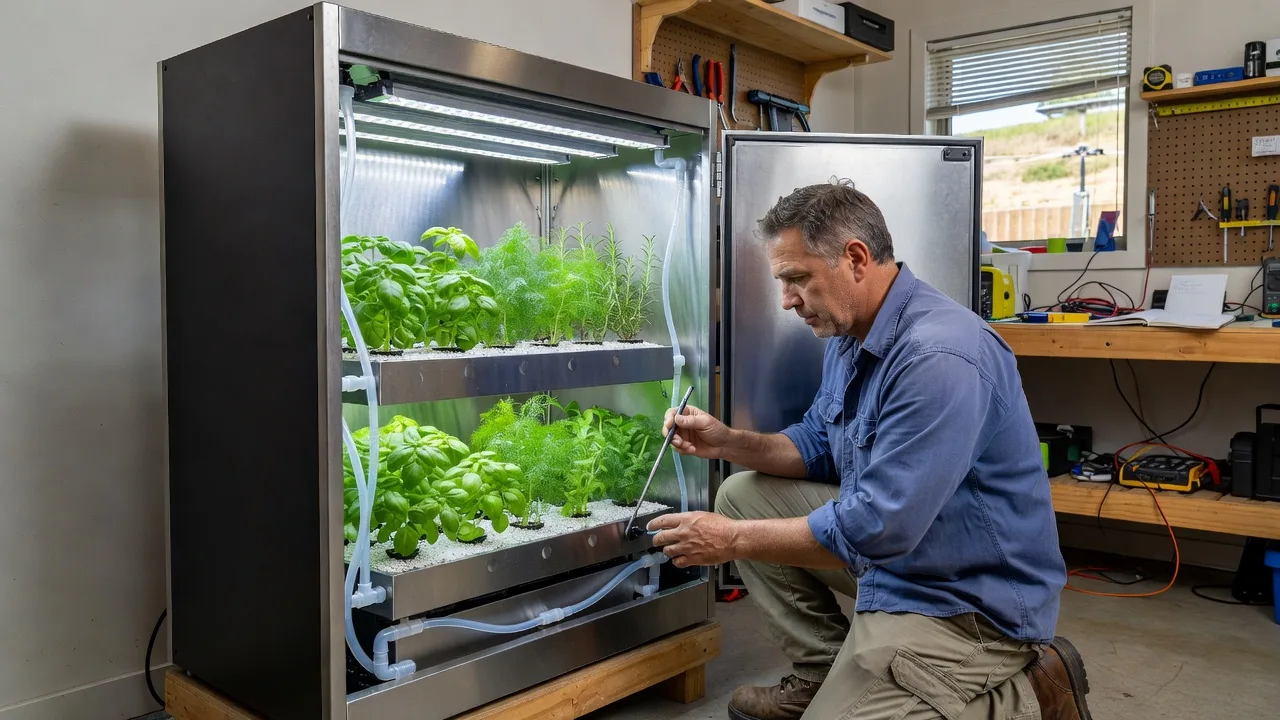
If your smart grow box still leaves soil bone-dry, lights stuck on, or leaves curling in a hot Australian summer, the automation is not doing its job. Homeowners and small cafés, studios, and offices across Australia buy these units for “zero effort” herbs and greenery—then hit pump clogs, failed sensors, and climate swings that no app setting alone will fix. This guide stays on the hardware: what fails, how to inspect it safely, and when an on-site specialist should take over. Fixwebnode works directly with individuals, sole traders, and local operators on this kind of local equipment troubleshooting—start at the Fixwebnode Australia landing page if you already know you need hands-on help.
Why reliable grow-box automation matters
A smart grow box is supposed to remove daily guesswork: moisture probes trigger pumps, timers or controllers drive full-spectrum LEDs, and fans, heaters, or humidifiers hold a stable microclimate. When any of those loops fail, you get root rot, leggy stems, burnt leaf tips, or a silent box that looks “smart” on the shelf and dumb in practice. In Australia, summer heat, hard water scale, dusty sheds and garages, and power interruptions make those failures more common than marketing copy admits. Getting the box stable again is mostly inspection, cleaning, calibration, and correct wiring—not another generic “tips for plants” list.
Why is my smart grow box failing watering, lights, or climate control?
Most “set and forget” grow boxes fail at one of three hardware points: the irrigation loop (pump, tubing, moisture probe), the lighting loop (driver, timer, or LED board), or the climate loop (temp/humidity sensor, fan, or heater). Quick DIY cleaning and sensor checks often restore basic control; repeated faults, burnt smells, swollen batteries, cracked reservoirs, or live-wiring issues mean you should stop and book an on-site inspection with Fixwebnode rather than keep powering the unit.
| Symptom | Quick check | When to call Fixwebnode |
|---|---|---|
| Soil dry or flooded despite “auto” mode | Probe placement, clogged line, empty tank | Pump runs dry, leaks, or controller ignores probe |
| Lights stuck on/off or plants stretch/burn | Timer schedule, loose connector, heat soak | Driver buzz, flicker, burnt smell, no output |
| Temp/humidity wild swings | Sensor dust, blocked vents, fan seized | No fan power, heater stuck, sensor reads nonsense |
Common issues with automated grow boxes
These problems show up repeatedly on consumer and light-commercial cabinets. Each has a different root cause—treat them separately so you do not “fix” the wrong subsystem.
1. Auto-watering that never starts—or never stops
Symptoms: App or panel shows wet while the medium is dusty; or the pump runs until the reservoir empties and roots sit in sludge. You may hear a brief hum then silence, see air bubbles in the line, or find white scale on drip emitters.
2. Grow lights out of cycle, dim, or scorching the canopy
Symptoms: Photoperiod ignores the schedule; LEDs flicker; one bar is dark; leaf edges bleach under the fixture while lower leaves stay pale. The driver may feel very hot, or the unit reboots when lights try to strike.
3. Climate control that drifts or fights itself
Symptoms: Internal readings disagree with a cheap external thermometer/hygrometer; fan runs constantly with no airflow; heater or dehumidifier never engages; condensation on walls and mould on soil surface even though “target humidity” looks fine on screen.
4. Controller power, probe ports, or enclosure safety faults
Symptoms: Random reboots after pumps kick in; USB-C or barrel jack warm to the touch; cracked reservoir wetting the baseboard; battery pack (if present) swelling; smell of hot plastic. These are not “settings” problems.
How to fix issue 1: watering loop (probe, pump, tubing)
Work with mains unplugged before opening panels. Have towels ready; keep water away from the controller board.
- Confirm the reservoir and intake. Fill to the marked line with clean water. Check the intake strainer for sludge, root fragments, and scale. Rinse the strainer under a tap and reseat it fully submerged so the pump cannot suck air.
- Inspect tubing and emitters. Disconnect outlet lines and flush with water into a bucket. Pinch-test soft tubing for collapses. Clear drip stakes with a thin brush or warm vinegar soak if mineral crust blocks the orifice, then rinse thoroughly.
- Reseat and place the moisture probe correctly. Wipe metal contacts dry and free of green corrosion. Insert the probe into the active root zone—not against the dry wall of a fabric pot and not sitting in a free water puddle. If the unit uses two probes, keep them at similar depth.
- Run a manual pump test from the control panel. Watch for steady flow without sputtering. If the pump screams, runs dry, or produces no flow with a clear path, stop; do not keep forcing auto cycles.
- Recalibrate thresholds if the manual allows. After a known watering, note the reading; after 24 hours of normal use, adjust only the wet/dry setpoints the manufacturer documents—avoid extreme values that force constant run or constant off.
When to call Fixwebnode: Persistent dry-run noise, cracked pump housing, controller that never changes state when you dunk or dry the probe, or any leak onto electrics. Bring the model name, power supply, and a short note of what the display showed; back up any custom schedules from the companion app before a bench or on-site visit.
How to fix issue 2: lighting loop (schedule, connectors, driver heat)
- Verify the photoperiod on the device itself—not only in the phone app. Many boxes desync after a power blip. Set a simple on/off window you can observe for one full day.
- Power down, then reseat every light connector. Unplug the mains first. Push lock connectors fully home; look for blackened pins, melted plastic, or a loose daisy-chain between bars.
- Check mounting height and heat. Raise bars if leaf tips bleach within days of a “full power” setting. Clear dust from heat sinks with a dry brush so the driver can shed heat in warm Australian rooms.
- Isolate a failed channel. If one bar is dark and others work, swap leads only if the manual shows identical keyed connectors—never force mismatched plugs. Note flicker or a loud buzz from the driver brick.
- Confirm the supply matches the label. Wrong voltage adapters and overloaded power boards cause brown-outs when lights and pumps start together. Use a single sound outlet and the original PSU where possible.
When to call Fixwebnode: Burnt smell, visible scorch on the driver, repeated breaker trips, or no light output after connectors and schedule checks. For drop-off or on-site work in Australia, bring the full fixture set, original supply, and photos of the wiring path; do not ship swollen batteries loose in a bag.
How to fix issue 3: climate loop (sensors, airflow, actuation)
- Cross-check with a second meter. Place a basic thermometer/hygrometer at canopy height for an hour. If the box reads 10°C or large humidity points off, treat the onboard sensor as suspect before rewriting plant targets.
- Clean the sensor path and vents. Power off. Gently brush dust from the sensor bay and intake grilles. Blocked vents make fans run flat-out while the chamber still stratifies hot at the top and damp at the root zone.
- Confirm free fan movement. With power off, spin the fan by hand (if accessible and safe). Stiffness, grinding, or warped blades mean replace—not “higher RPM in the app.”
- Watch one full heat/cool or humidify cycle. Change the setpoint a few degrees and listen for the relay or module. No click, no airflow change, and no temperature move after a reasonable wait points to a failed actuator or control board—not “wrong plant profile.”
- Reduce external load. Move the cabinet off sun-facing glass and away from oven exhaust. Automation cannot hold a microclimate if the room regularly overwhelms a small Peltier or single fan in peak summer.
When to call Fixwebnode: Sensor values frozen or absurd, heater stuck on, water under a humidifier pad near mains parts, or mould returning within days of a clean. An in-person inspection is safer than opening sealed climate modules yourself.
How to fix issue 4: power, ports, and enclosure safety
- Stop using the unit if you see swelling, scorch marks, or standing water on electronics. Unplug at the wall. Do not “just finish this grow cycle.”
- Photograph cable routes and label plugs before disconnecting anything so reassembly is straightforward.
- Dry only external, unpowered surfaces with absorbent cloths; never use a hair dryer on high heat into a wet controller bay.
- Check strain relief where tubing and low-voltage leads pass through the case—chafed insulation is a common local wear point after moves between rooms.
When to call Fixwebnode: Any of the above safety signs, or a controller that dies whenever the pump or lights load the supply. Expect to explain the device type (cabinet size, pump voltage if marked, Wi-Fi or offline controller) and to confirm you have exported or photographed schedules. Service coverage is described on the Australia service area page and the full service-areas hub; availability is arranged case by case, often with flexible timing when you book early.
When DIY is enough vs when to book Fixwebnode
DIY is enough when the fault is dirt, scale, obvious mis-seated probes, a desynced timer, blocked vents, or a simple empty tank—and the unit behaves correctly after one clean manual test cycle. Stay inside manufacturer access panels; do not bypass fuses or rewire mains.
Book Fixwebnode when faults repeat after cleaning, when readings and actuators disagree, when there is heat damage, leakage onto boards, or you need confident on-site diagnosis without marketplace middlemen. Fixwebnode is a direct specialist provider for individuals, sole traders, and local operators—not a bidding board. If your grow controller ties into a wider shop site or Linux-based logging host you also maintain, you can discuss adjacent needs such as Automated Linux Backup & Disaster Recovery in Melbourne or WooCommerce automated daily backups and security setup in the same conversation; the grow-box hardware issue remains the priority for this visit type.
For local / on-site hardware work, bring or have ready: the grow cabinet or controller module, labelled power supply, any external sensors, and a backup of schedules or app screenshots. Do not present swollen cells or dripping reservoirs as “still usable.”
Get the box back to true set-and-forget growing
Fresh herbs and steady ornamental growth only happen when watering, lighting, and climate loops agree with the real medium and the real room—not when the dashboard looks green. Work through the checks above in order, keep water and mains apart, and stop at the first safety red flag. When you want a direct specialist conversation or an on-site booking for grow-box automation hardware in Australia, use the Fixwebnode landing page for individuals and local operators and outline the symptoms, model, and what you already tried. We will help you sort the next step without guesswork.