




 Multi-Vendor & Complex SaaS Marketplaces
 Modern Headless & Jamstack Web Development
 High-End Corporate & Specialized Business Websites
 Advanced API, Checkout & Database Troubleshooting
SSD & Memory Upgrades for Melbourne Computers
Extend ageing Melbourne PCs with fast SSD and memory upgrades that cut boot times and lag.
We replace failing mechanical drives and undersized RAM for home offices, strata apartments, and small business desks across metro Melbourne—so you keep the machine you know without the spin-up wait. Clear fixed scopes, plain-English handoff, and careful data migration.
Ready to speed things up? Call 0421498927 or book via fixwebnode.com.au/contact-support.
- On-site or drop-off friendly where access allows
- Drive health check before you commit
- Direct provider—no bidding or middlemen
About this service
Give your Melbourne computer a second life with solid-state storage and fresh RAM—faster boots, quieter desks, and fewer freeze-ups without buying a whole new machine.
What You'll Get
- Drive health assessment - SMART checks, free-space review, and a clear go/no-go on upgrade versus replace
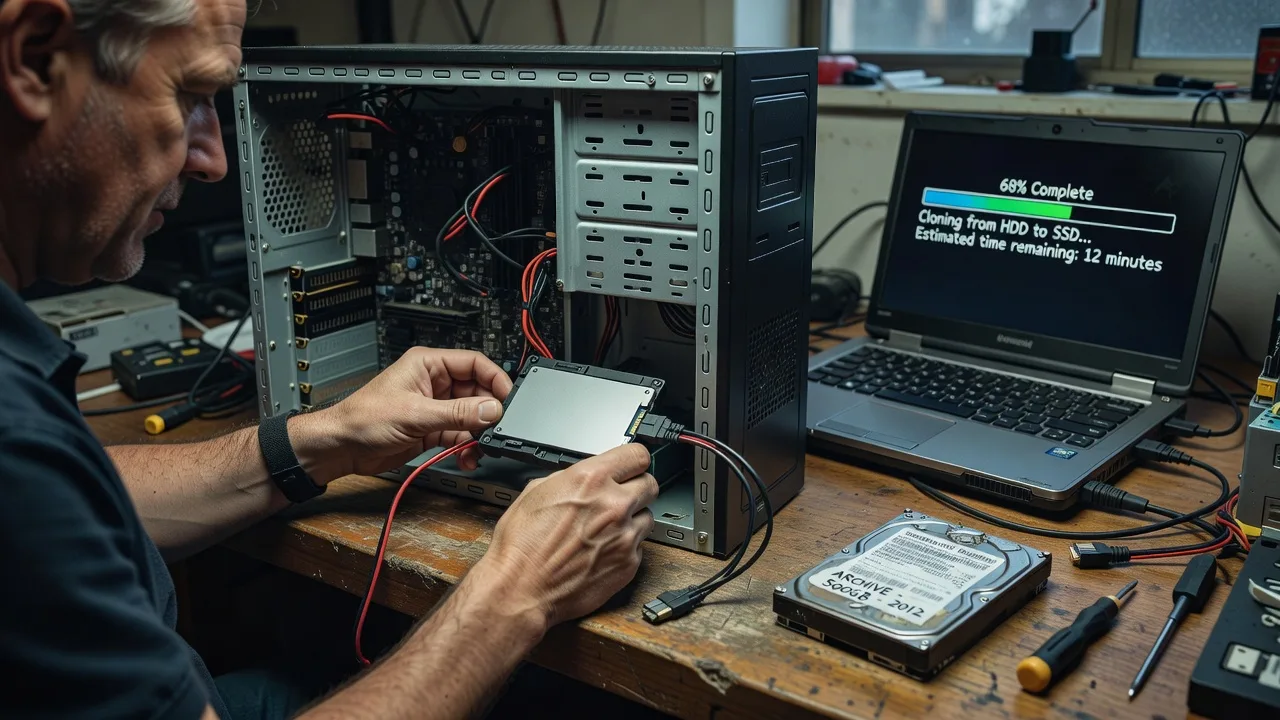
- SSD installation & OS migration - Clone or clean install so Windows or macOS lands on the new drive intact
- Memory upgrade sizing - Match your motherboard limits, dual-channel layout, and real workload needs
- Firmware & trim setup - AHCI/NVMe mode, TRIM, and power settings tuned so the SSD stays fast
- Post-upgrade proof - Boot-time notes, crystal-clear before/after feel, and simple care tips
- Secure handling of old media - Optional wipe guidance or drive return so your data stays under your control
Serving Melbourne & surrounds
Melbourne machines work hard in mixed settings: CBD tower desks that never fully shut down, warehouse PCs logging stock, and home offices in dense apartment blocks where noise and heat matter. We plan upgrades around access, parking, and strata rules—not a generic national script.
- Professional suites and shared offices that need quiet, quick-resume machines between client sessions
- Industrial and light-commercial benches where older towers still run specialised software but choke on spinning disks
- On-site visits across metro Melbourne when desktops cannot leave the desk; drop-off or remote prep when that fits better—including practical routes toward inner-north and south-east hubs such as Melbourne and Clayton when scheduled
How We Work
- Step 1: Reach Out - Tell us the model, symptoms (slow boot, disk thrashing, low free RAM), and whether the PC can travel or needs on-site work—we listen first
- Step 2: Tailored Plan - Fixed quote for drive capacity, RAM kit, migration path, and labour—no surprise line items mid-job
- Step 3: We Deliver - Install hardware, migrate data carefully, verify boot and sleep/resume, and explain what changed in plain language
- Step 4: Confirm & Follow-up - You sign off on speed and stability; optional check-in if anything feels off after a few days of real use
Common Issues & How to Fix Them
These are patterns we see constantly on ageing Melbourne office and home machines—symptoms first, then safe DIY checks before you open the case.
Boot takes 3–8 minutes and the drive light never stops blinking
Classic mechanical-drive thrash: Windows is paging tiny files across a worn platter while antivirus and startup apps pile on—especially after long idle periods on always-on office PCs.
- Step 1: Open Task Manager → Performance → Disk. Note % utilisation at idle and whether response time sits above ~20 ms for long stretches.
- Step 2: Disable non-essential startup apps (Settings → Apps → Startup) and run a full disk cleanup plus storage sense; avoid defrag on failing drives as a cure-all.
- Step 3: Reboot twice and time from power button to usable desktop. If still multi-minute with disk pegged, the drive is the bottleneck—plan an SSD migration rather than more cleanup.
Machine freezes when many browser tabs and Office files are open, yet the disk is not 100% busy
RAM pressure forces constant page-file use. On 8 GB systems with Chrome-heavy workflows common in Melbourne agencies and student flats, the OS looks “fine” until multitasking spikes.
- Step 1: In Task Manager → Performance → Memory, watch Committed vs Installed and whether In use stays above ~80% while you work.
- Step 2: Close heavy tabs, note the relief, then check motherboard max RAM and generation (DDR3/DDR4/DDR5) via a reputable CPU-Z style read or the system manual—never mix mismatched kits carelessly.
- Step 3: After a correct dual-channel kit install (or our upgrade), confirm memory shows the new total and that freezes under the same tab load stop. Good looks like headroom under load; bad is still thrashing with low free physical RAM.
New SSD installed elsewhere but the PC still feels sluggish or boots to the old drive
Clone jobs often leave the HDD first in boot order, or SATA mode stays on IDE/RAID legacy settings so the OS never fully benefits from the SSD—very common after DIY weekend upgrades.
- Step 1: Enter firmware/BIOS and confirm the SSD is first in boot priority; temporarily disconnect the old HDD if you need a clean test boot.
- Step 2: Ensure SATA mode is AHCI for SATA SSDs (change carefully with correct drivers) and that NVMe drives sit in a supported slot with CPU lanes, not a crippled chipset path on older boards.
- Step 3: From the OS, confirm the system volume is the SSD, TRIM is available, and a short crystaldisk-style health/benchmark shows low latency. Expert insight from years of Melbourne field work: on many Dell/HP office towers we see after CBD desk refreshes, the hidden gotcha is a leftover Intel RST/RAID metadata partition that keeps Windows half-tied to the old volume—wiping that cleanly and fixing boot entries is what actually unlocks the “instant on” feel, not just plugging in a faster drive.
When DIY is not enough (urgent, unsafe, recurring, or burning time), book Fixwebnode for direct professional support—no freelancers, bidding, or marketplace noise.
Why Choose Fixwebnode
We are a direct provider blending infrastructure-grade care with patient, jargon-free explanations. You get one accountable team for hardware choices that match real Melbourne workloads—not a bid board.
- ✓ Fixed quotes for SSD capacity, RAM kits, migration labour, and on-site versus drop-off paths
- ✓ Local awareness of strata access, shared offices, and machines that cannot leave specialised desks
- ✓ Plain-English handoff so staff or family know what changed and how to keep the drive healthy
Tools & Technologies
SATA and NVMe SSDs, dual-channel DDR3/DDR4/DDR5 kits, disk cloning and imaging workflows, SMART diagnostics, firmware/AHCI/NVMe configuration, secure erase guidance, Windows and macOS migration checks, and basic thermal/cable management inside desktop chassis.
Perfect For
Melbourne small businesses, clinics, students, and home offices sitting on five-to-ten-year-old towers or laptops that still run needed software but crawl on spinning disks. Ideal when budget prefers a targeted upgrade over a full PC replacement, and you want calm technical help plus clear human explanations—not a marketplace auction.
Power up your support path when you are ready—dial 0421498927 or visit fixwebnode.com.au/contact-support for a scoped plan.
Choose a package
Remote or drop-off health check with upgrade plan and parts shortlist for one PC.
Single SSD install or clone plus basic setup verification for one desktop or laptop.
Full SSD plus memory upgrade with on-site preference, dual-drive tidy, and follow-up tune.
FAQ
We support metro Melbourne with a mix of on-site visits and drop-off or remote prep depending on the chassis and access. Towers that cannot leave a reception desk or warehouse bench are scheduled on-site where practical; laptops and portable desktops can often be turned around faster via drop-off. Travel and access notes are confirmed when you book so strata or loading-dock rules are not a surprise.
Our standard path is a careful clone or selective migration so your apps and documents come across. We still recommend a fresh backup before any drive work. If a clean install is smarter because of malware or deep clutter, we plan that with you first and restore what you need.
If freezes happen while the disk is not pegged but memory use stays high with many tabs and documents open, RAM is usually part of the fix. We size kits to your motherboard limits and dual-channel best practice so you are not paying for modules the board cannot use.