




 Multi-Vendor & Complex SaaS Marketplaces
 Modern Headless & Jamstack Web Development
 High-End Corporate & Specialized Business Websites
 Advanced API, Checkout & Database Troubleshooting
Set Up Your Laptop for NDIS Telehealth Appointments
Get your laptop ready for reliable NDIS telehealth. Camera, mic, apps, accessibility, and connection checks so appointments run smoothly from home.
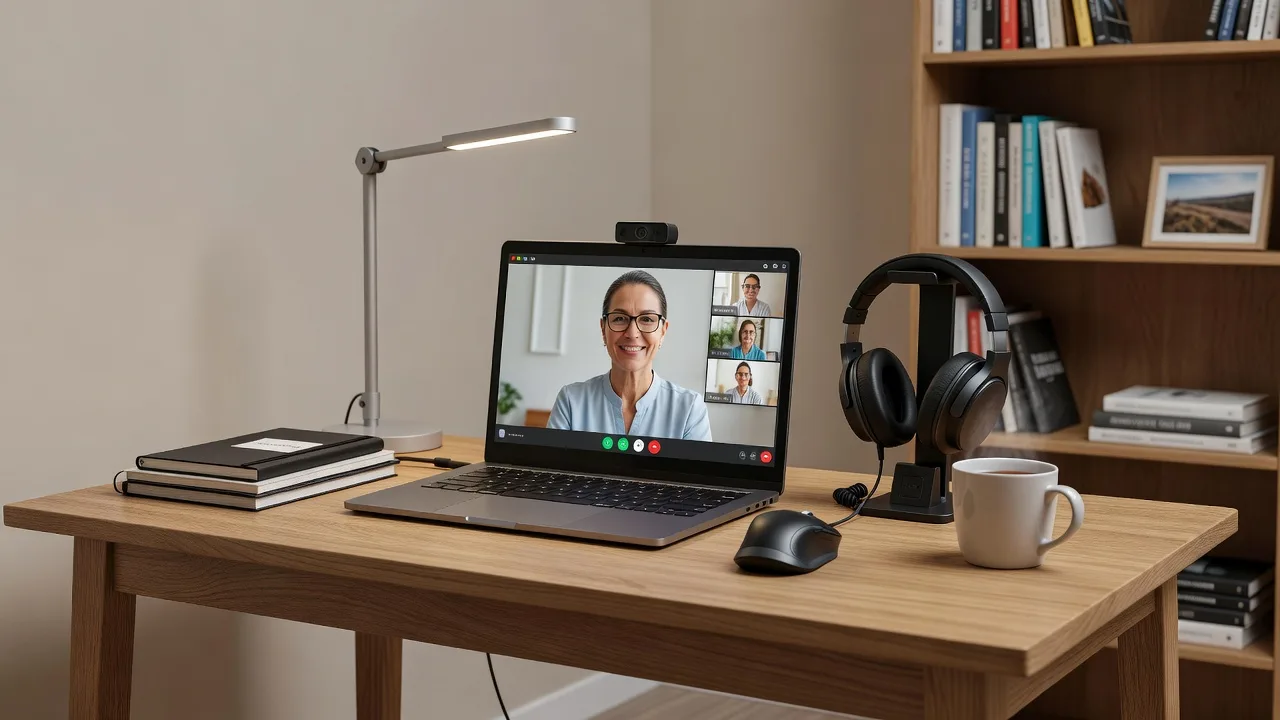
This guide is for NDIS participants, support workers, and carers who need a laptop that works reliably for telehealth with GPs, specialists, psychologists, OTs, and other providers. By the end you will have checked hardware, updated the system, configured camera and microphone, installed the right apps, tuned accessibility settings, secured privacy, and run a full test call.
Steps cover Windows 10/11 (most common for NDIS-funded devices), with notes for macOS where they differ. You do not need advanced IT skills. Allow 45–90 minutes the first time. Have your charger, a quiet space, and any provider links or app invites ready.
What you need before you start
Confirm you have:
- A laptop with a working webcam and microphone (built-in is fine; USB webcam optional)
- Stable internet (wired Ethernet is best; otherwise strong Wi‑Fi)
- Power cable plugged in during appointments
- Headphones or earbuds with a mic if the room echoes or you share space
- Your NDIS provider’s preferred platform (often Zoom, Microsoft Teams, Google Meet, Coviu, Healthdirect Video Call, or a clinic portal)
- Login details for email and any patient portal
If the laptop was supplied under NDIS assistive technology, keep the original packaging and support contacts; note the serial number somewhere safe for warranty or repair claims.
Update the operating system and drivers
Out-of-date systems cause failed video, missing cameras, and security risks. Update before every important block of appointments if you can.
Step 1 — Windows Update
Open Settings → Windows Update (Windows 11) or Settings → Update & Security → Windows Update (Windows 10). Install all available updates and restart when prompted. Repeat until it says you are up to date.
Optional PowerShell check (Run as administrator):
Get-WindowsUpdateLog
Get-HotFix | Sort-Object InstalledOn -Descending | Select-Object -First 10
Step 2 — Chipset, graphics, audio, and camera drivers
Use Windows Update first. If the camera or mic still fails, install the laptop maker’s support app (Lenovo Vantage, Dell SupportAssist, HP Support Assistant, ASUS MyASUS) and apply audio/webcam/BIOS updates from there—not random third-party driver sites.
Step 3 — macOS note
Apple menu → System Settings → General → Software Update. Install updates and restart. Keep the Mac plugged in during large updates.
Verify: After reboot, open Settings and confirm no pending critical updates remain.
Check camera, microphone, and speakers
Telehealth fails most often on permissions and default devices, not “broken” hardware.
Step 1 — Windows privacy permissions
Settings → Privacy & security → Camera → turn Camera access and Let apps access your camera on. Do the same under Microphone. Allow desktop apps if your telehealth client is not only a browser.
Step 2 — Select the correct devices
Settings → System → Sound. Under Output, pick your headphones or laptop speakers. Under Input, pick the built-in mic or headset mic. Speak and watch the input level move.
Camera quick test: open the Camera app from the Start menu. You should see a live image. Close other apps that might lock the camera (Skype, Teams, browser tabs).
Step 3 — Browser permissions (Chrome / Edge)
When a telehealth site asks for camera/mic, choose Allow. To review later: padlock icon beside the URL → Site settings → Camera / Microphone → Allow. Reset a stuck site with:
- Chrome/Edge: Settings → Privacy and security → Site settings → Camera or Microphone
Step 4 — Optional USB webcam
Plug into a USB-A or USB-C port directly (avoid unpowered hubs). In Sound and Camera settings, select the USB device by name. Position it at eye level on a stable stand if the laptop lid angle is awkward.
Tip: Soft front lighting (window or lamp in front of you, not behind) improves how clinicians see you more than buying a new camera.
Install and configure telehealth apps
Install only what your providers use. Browser-based calls are fine when the clinic supports them; native apps are often more stable for longer sessions.
Step 1 — Microsoft Teams
Download from the official Microsoft site or Microsoft Store. Sign in with the account the provider invited (work/school or personal as instructed). Test: click your profile → Settings → Devices → Make a test call.
Step 2 — Zoom
Install Zoom Workplace from zoom.us only. Open Zoom → Settings → Video and Audio. Tick “Test Speaker and Microphone” before joins. Enable “HD” only if your upload speed is strong; turn it off on slow links.
Step 3 — Google Meet / browser portals
Use an up-to-date Chrome or Edge. Bookmark the exact clinic link. Disable heavy extensions for that site if the call freezes (ad blockers sometimes break WebRTC).
Step 4 — Coviu, Healthdirect, and clinic portals
Follow the SMS/email link on the appointment day. Complete any “test devices” page the portal offers 10–15 minutes early. Save the confirmation email in a folder named Telehealth.
Step 5 — Keep apps updated
Enable auto-update in each app store/client. Outdated Zoom/Teams builds are a common cause of “cannot start video” errors after OS updates.
Stabilise your internet connection
Video needs consistent upload more than a huge download number. Aim for at least ~5 Mbps up and down for one-to-one video; more if others stream on the same connection.
Step 1 — Prefer Ethernet
If the laptop has Ethernet (or a USB‑C/USB‑A Gigabit adapter), plug into the router for appointments. Wired links drop far less than Wi‑Fi.
Step 2 — Improve Wi‑Fi if you must use it
- Sit in the same room as the router when possible
- Use 5 GHz if the laptop supports it and signal is strong
- Pause large downloads, cloud backups, and 4K streaming on other devices
- Ask others in the house to avoid heavy use during the slot
Step 3 — Speed and quality check
Run a test on a trusted site (e.g. your ISP tool or a standard speed test) shortly before the call. Note download, upload, and ping. If upload is under ~3 Mbps, switch to audio-preferred mode in the app or move closer to the router.
Windows quick network view:
ipconfig /all
ping -n 20 1.1.1.1
Look for stable replies without long spikes. High packet loss means fix Wi‑Fi/Ethernet before the appointment, not during it.
Step 4 — Mobile failover
If home internet is unreliable, enable phone hotspot as backup and test it once in advance. Keep the phone charged. Tell the clinician you may reconnect if the primary link drops.
Configure accessibility features (NDIS-focused)
Use built-in tools so you can see, hear, and control the session without fighting the OS mid-call.
Windows — quick access
- Magnifier: Win + Plus to zoom; Win + Esc to exit
- High contrast / themes: Settings → Accessibility → Contrast themes
- Text size: Settings → Accessibility → Text size
- Captions: Settings → Accessibility → Captions; in Teams/Zoom enable live captions for the meeting
- Narrator: Settings → Accessibility → Narrator (only if you use screen reading daily—practice before clinical calls)
- Mouse / keyboard: Sticky Keys, Mouse Keys, and larger pointer under Accessibility
- Focus assist: Settings → System → Notifications — turn on Do not disturb for the appointment window so alarms do not overlay the video
macOS
- System Settings → Accessibility → Display, Zoom, Spoken Content, Captions
- Control Centre → Focus → enable Do Not Disturb for the session
In-app accessibility
- Zoom: always show meeting controls; enable captions; pin the clinician’s video
- Teams: Language and speech → live captions; device settings for larger UI scaling via Windows display scale (125–150% if needed)
Tip: If fine motor control is difficult, connect a large external mouse or adaptive switch gear before the call and confirm the cursor moves smoothly on the video window.
Set up the room, lighting, and positioning
Clinicians need to see and hear you clearly; you need privacy and comfort for potentially long sessions.
- Choose a quiet, private room. Close doors; put a “session in progress” note outside if others live with you.
- Sit with a light source in front of your face. Avoid bright windows directly behind you.
- Place the camera at eye level. Stack a stable book under the laptop if needed so you are not looking down.
- Frame head and shoulders; leave a little space above your head.
- Wear headphones to cut echo and protect privacy of what the clinician says.
- Keep water, any required documents, Medicare/NDIS numbers, medication list, and a notepad within reach.
- Charge to 100% and leave the charger connected. Set power mode to Best performance for the session.
Windows power quick path: Settings → System → Power & battery → Power mode → Best performance (plugged in).
Privacy, security, and NDIS-safe habits
Health conversations are sensitive. Treat the laptop like a clinical tool for the duration of the call.
- Use a strong device login (PIN, password, or Windows Hello). Lock the screen when you step away (Win + L).
- Do not share meeting links on social media or unsecured group chats.
- Join from your own account; avoid public/shared library PCs for clinical care.
- On shared family laptops, create a separate Windows user for the participant so browser history, saved passwords, and camera permissions stay controlled.
- After sessions, hang up fully (Leave / End) so the mic and camera release.
- Only install remote-support tools your plan manager or AT provider recommends; remove unknown “helper” apps.
- Keep antivirus/Microsoft Defender on. Windows Security → Virus & threat protection → quick scan weekly.
Defender quick status:
Get-MpComputerStatus | Select-Object AMServiceEnabled, AntivirusEnabled, RealTimeProtectionEnabledIf RealTimeProtectionEnabled is False, open Windows Security and turn protection back on before handling health portals.
Run a full dress-rehearsal before the real appointment
Do this the day before a first-time provider or after any OS update.
Step 1 — Device checklist
- Camera preview OK
- Mic levels move when you speak
- Speakers/headphones audible
- Internet speed acceptable
- App signed in; test call completed (Teams/Zoom)
Step 2 — Join flow
Open the exact invite link. Practise mute/unmute, stop/start video, and chat. Find the Leave button. Confirm captions if you need them.
Step 3 — Support person plan
If a support worker helps with tech, agree who speaks to the clinician, how consent is handled on camera, and a backup phone number if video fails. Keep the phone nearby but silenced.
Step 4 — Calendar buffer
Block 15 minutes before and after. Early login catches updates and permission prompts without eating clinical time.
Day-of appointment runbook
- Plug in power; close heavy programs (games, large downloads, extra browsers).
- Connect Ethernet or sit on best Wi‑Fi; pause backups.
- Enable Do not disturb / Focus.
- Launch the correct app; set camera, mic, speaker defaults.
- Join 5–10 minutes early; complete any waiting-room checks.
- State your name and confirm audio/video with the clinician.
- If video fails, switch to phone audio while keeping the shared screen/video instructions if needed—ask the provider’s preferred fallback.
- When finished, Leave the meeting, lock the PC, and note any follow-up tasks while they are fresh.
Troubleshooting
Symptom: Black video or “camera in use”
Cause: Another app holds the camera, or privacy is off.
Fix: Close Teams/Zoom/Camera/browser tabs. Toggle camera privacy off/on. Reboot. Unplug/replug USB webcam. In Device Manager, under Cameras, right-click → Disable device, then Enable device.
Symptom: Others cannot hear you
Cause: Wrong input device, muted app, or muted system mic.
Fix: Unmute in-app and on headset inline controls. Settings → System → Sound → Input → choose correct mic and raise volume. In Zoom/Teams device settings, pick the same mic and run the test again.
Symptom: Echo or robotic audio
Cause: Speakers feeding the mic; poor uplink.
Fix: Use headphones. Mute when not speaking. Lower speaker volume. Move closer to router or switch to Ethernet.
Symptom: Freezing / pixelated video
Cause: Weak upload or CPU overload.
Fix: Stop HD video; turn off virtual backgrounds; close extra tabs; wire to Ethernet; ask others to pause streaming. As last resort, disable your outgoing video and continue on audio.
Symptom: “Permission denied” in browser
Fix: Site settings → allow camera/mic; remove the site from Block list; try a Chromium browser if Safari/Firefox blocks the clinic’s WebRTC setup.
Symptom: Laptop sleeps mid-call
Fix: Power settings → screen and sleep → set longer times while plugged in; keep the charger connected; move the mouse occasionally if policy forces short timeouts on managed devices.
Symptom: Cannot install apps (managed/NDIS device)
Fix: Contact the plan manager, AT supplier, or IT support named on your device paperwork. Do not bypass security software. Request the clinic’s browser-based option meanwhile.
Windows camera enumeration (advanced check):
Get-PnpDevice -Class Camera,Image | Format-Table Status, Class, FriendlyName -AutoSizeStatus should show OK for the device you intend to use.
Conclusion
A dependable telehealth laptop is the result of updates, correct camera/mic permissions, the right apps, a stable network path, accessibility settings that match your needs, and a short rehearsal before clinical time. Work through hardware and OS updates first, lock in audio/video defaults, then practise the exact join link your NDIS providers use. On appointment day, power, privacy, and an early login prevent most failures. If something still breaks, use the troubleshooting checks above, fall back to phone audio with the clinician’s agreement, and note what failed so your support team or AT provider can fix it before the next session.